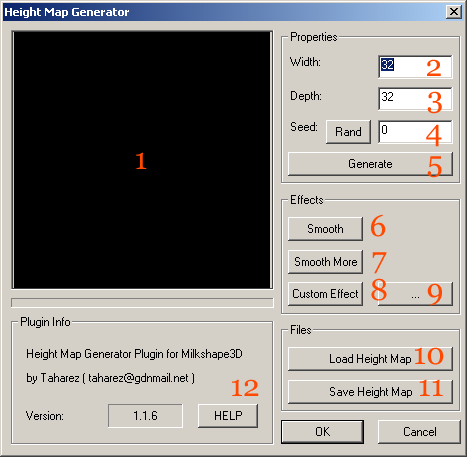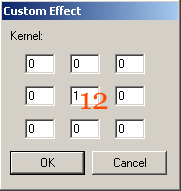
The Custom Effect tool lets you create your own effect to apply to the loaded heightmap. To use the Custom Effect tool, you must first define the effect, which you do by pressing the '...' button [9] next to the Custom Effect button [8]. This will bring up the Custom Effect dialog.

The Custom Effect Dialog consist of nine fields that enable you to define a 3x3 kernel to use on your heightmaps. Each field can contain a positive or negative number, that represnts a multiplier. When you have defined a kernel and then use it by pressing the Custom Effect button [8], the kernel will be applied for every point in the heightmap. This means that the program loops through every point, and calculate it's new value by multiplying the value of the surrounding points with the corresponding value in the kernel, and then divide by the sum of the multipliers.
Here are a few example kernels for you to try: This one sharpens the heightmap
[-1][-1][-1]
[-1][9][-1]
[-1][-1][-1]
And this one shifts it to the right
[0][0][0]
[0][0][1]
[0][0][0]